Can You Proof Dough In Air Fryer: Easy Guide
Yes, you can proof dough in an air fryer by using its warm, enclosed space at a very low temperature.
If you know how yeast reacts to heat and moisture, you can proof dough in an air fryer quickly and safely. This guide explains the best settings, timing, container choices, common mistakes, and simple ways to get soft, well-risen dough without a special proofing box.
Can You Proof Dough in an Air Fryer?
Yes, you can proof dough in an air fryer. The appliance can act like a small, warm proofing chamber. Its enclosed basket helps protect dough from cool air and drafts.
The main challenge is temperature control. Yeast works well in a warm space, but high heat can slow it down or kill it. Most yeast dough rises best around 75°F to 100°F, though the exact ideal range depends on the recipe and yeast type.
When you proof dough in an air fryer, use the lowest heat setting or a proofing function if your model has one. Some air fryers become too hot even on their lowest setting, so always check the temperature before adding your dough.
Why Use an Air Fryer to Proof Dough?
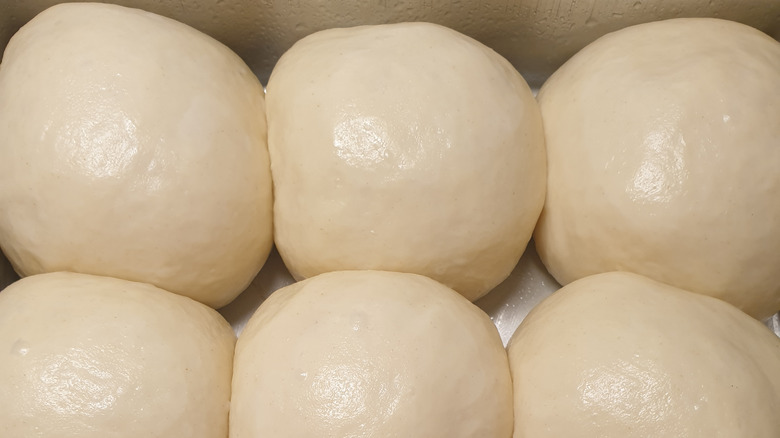
An air fryer offers a warm, covered space that can help dough rise in less time. This is helpful when your kitchen is cold, especially during winter.
The basket also takes up less room than an oven. You do not need to turn on your full oven or find a sunny spot near a window. For small batches, the air fryer can be a practical choice.
Here are the main benefits:
- It creates a warm, enclosed space.
- It protects dough from cool drafts.
- It may reduce proofing time.
- It works well for small loaves, rolls, pizza dough, and buns.
- It does not require a separate proofing box.
- It can help maintain a steady environment when your kitchen temperature changes.
Still, an air fryer is not always better than room-temperature proofing. Fast rising can sometimes produce less flavor. A slow rise in the refrigerator often gives bread a deeper taste and a more developed texture.
How to Proof Dough in an Air Fryer
The safest method is simple. You do not need to cook the dough or use strong heat. You only need a gently warm space.
Step 1: Prepare the dough
Make your dough according to the recipe. Knead it until it feels smooth and elastic. A well-kneaded dough should stretch without tearing too easily.
Place the dough in a lightly greased bowl. Use a neutral oil, such as vegetable, canola, or olive oil. Turn the dough once so the surface has a thin coating.
Step 2: Choose the right container
Use a heat-safe bowl that fits comfortably inside the air fryer basket. Glass, stainless steel, or food-safe silicone can work well.
Do not force a large bowl into the basket. The dough needs room to expand, and the bowl should not touch the heating element.
Step 3: Cover the dough
Cover the bowl with plastic wrap, a reusable cover, or a clean damp towel. Covering prevents the dough surface from drying out.
A dry skin can form on uncovered dough. This skin may stop the dough from expanding evenly and can create tough patches in the finished bread.
Step 4: Warm the air fryer gently
If your air fryer has a proofing setting, use it. Set the temperature close to 80°F to 95°F.
If it does not have a proofing mode, turn the air fryer on for about 1 minute at its lowest setting. Then turn it off. Place the covered dough inside the warm basket.
Some models hold heat for several minutes. Others cool down quickly. Check the dough often instead of relying only on the clock.
Step 5: Let the dough rise
Proofing time depends on the recipe, room temperature, yeast, and dough size. The first rise may take 30 to 90 minutes.
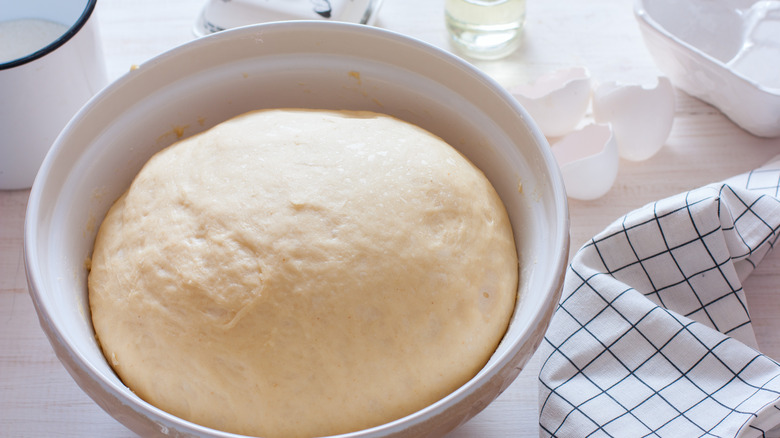
Look for visual signs rather than a fixed time. The dough should usually become about twice as large. If you press it gently with one finger, the mark should slowly spring back.
When you proof dough in an air fryer, check it every 15 to 20 minutes. This helps prevent overproofing.
Best Air Fryer Temperature for Proofing Dough
The best air fryer temperature for proofing dough is usually between 80°F and 95°F. This range gives yeast a warm environment without exposing it to excessive heat.
Avoid setting the air fryer above 100°F unless your recipe gives clear instructions. Temperatures around 120°F and higher can damage yeast. Very hot air can also form a crust on the dough before the inside rises.
Use these general settings:
- Proofing function: Set it to about 80°F to 95°F.
- Lowest temperature setting: Use it only if the air fryer stays below 100°F.
- No low-temperature setting: Warm the appliance briefly, turn it off, and then add the covered dough.
- Very powerful air fryer: Leave the appliance off and use the basket as a draft-free box.
A small kitchen thermometer can make this process much easier. Place it in the empty basket for a few minutes to learn how warm your air fryer becomes.
How Long Does Dough Take to Proof in an Air Fryer?
Dough may take 30 to 60 minutes to proof in an air fryer, but the time can vary. Enriched dough with butter, eggs, or sugar may rise more slowly. Lean dough made with flour, water, yeast, and salt may rise faster.
The amount of yeast also affects the timing. Fresh yeast and active dry yeast can behave differently from instant yeast. Always consider the recipe’s instructions as a starting point.
Use the dough itself as your guide. It is ready for the next step when it has expanded well and feels airy.
Signs that dough is ready include:
- The dough has nearly doubled in size.
- The surface looks smooth and slightly puffy.
- Small air bubbles appear under the surface.
- A gentle finger press leaves a mark that slowly fills in.
- The dough feels lighter than it did before proofing.
If the dough springs back quickly, it needs more time. If it collapses after a gentle touch, it may be overproofed.

Can You Proof Dough in an Air Fryer Without Turning It On?
Yes, you can proof dough in an air fryer without turning it on. The closed basket can protect the dough from drafts, even when the appliance is at room temperature.
This method works best in a warm kitchen. You can also preheat the air fryer for 30 to 60 seconds, turn it off, and place the covered dough inside.
Never leave the air fryer running at a high cooking temperature while dough is proofing. The heat may rise too quickly and partially cook the outside of the dough.
For a gentle warming method, try this:
- Turn on the air fryer at its lowest setting for 30 to 60 seconds.
- Turn it off completely.
- Wait 1 to 2 minutes.
- Place the covered dough inside.
- Check the dough every 15 minutes.
This method works well for pizza dough, dinner rolls, and small bread loaves.

Which Doughs Can You Proof in an Air Fryer?
You can proof most yeast-based doughs in an air fryer if the container fits and the heat remains gentle.
Good options include:
- Pizza dough
- Dinner roll dough
- Hamburger bun dough
- Cinnamon roll dough
- Garlic knot dough
- Small sandwich bread dough
- Flatbread dough
- Brioche dough
- Bagel dough before shaping
Enriched doughs, such as brioche and cinnamon roll dough, may need more time. Their butter, eggs, and sugar can slow yeast activity.
Sourdough can also be placed in an air fryer for a warm rise, but it needs more care. Sourdough often benefits from a slower fermentation. Too much warmth may speed up the process and reduce flavor.
When you proof dough in an air fryer, use the same visual signs for every type of dough. Size, texture, and airiness matter more than a specific number of minutes.
Can You Proof Dough in an Air Fryer Basket?
You can proof dough directly in an air fryer basket, but a bowl is usually safer and easier. The basket holes may allow dough to stick or spread through the openings.
If you want to proof dough in the basket, line it with parchment paper or use a small heat-safe pan. Lightly oil the surface first.
Do not use parchment paper by itself in a running air fryer. Loose parchment can move toward the heating element. It should be held down by the bowl or dough, and the air fryer should remain off or at a safe proofing temperature.
For sticky dough, a covered bowl is the best choice. It keeps the dough contained and makes cleanup easier.

Common Mistakes When You Proof Dough in an Air Fryer
Air fryers are powerful. A small mistake can create a hot environment that harms the dough.
Using too much heat
High heat can kill yeast or begin cooking the dough. If the surface becomes firm before the dough expands, the air fryer is too hot.
Skipping the cover
Uncovered dough can dry out quickly. Always use a cover or a clean damp towel.
Proofing for too long
Warm conditions can speed up fermentation. Check the dough early instead of waiting for the full time listed in the recipe.
Using a cold metal basket
A cold basket will not harm dough, but it may not help it rise. The dough needs warmth from the surrounding air, not direct heat from below.
Forgetting the second proof
Many recipes need a second rise after shaping. This step helps rolls and buns become light and tender. You can proof the shaped dough in an air fryer in the same way, but the second rise often takes less time.
Starting the cooking cycle too soon
If dough has proofed in the basket, remove it before preheating the air fryer for baking. A sudden blast of heat may set the outer crust too early.

Tips for Better Results
A few small habits can make proofing more reliable.
- Use a thermometer to check the air fryer temperature.
- Leave enough space for the dough to double.
- Grease the bowl lightly to prevent sticking.
- Cover the dough well.
- Check progress often.
- Use instant yeast according to the recipe instructions.
- Avoid placing dough directly under the heating element.
- Let refrigerated dough warm gradually.
- Follow the recipe’s signs of readiness, not only its time estimate.
- Use a cool-down period if the air fryer feels hot.
In my own kitchen tests and recipe work, the most common problem is not underproofing. It is overheating. People often assume a warmer air fryer will always make dough rise faster, but yeast needs gentle warmth, not intense heat.
A slow, steady rise usually gives you better control. Think of the dough as a small living system. It needs warmth, moisture, food, and time.
Air Fryer Proofing Compared With Oven Proofing
An oven with a proofing setting may hold a more stable temperature than an air fryer. It also offers more room for large bowls and multiple trays.
An air fryer is better suited to small batches. It heats quickly and takes up less space, but its temperature may fluctuate more.
Here is a simple comparison:
| Feature | Air fryer | Oven |
|---|---|---|
| Space | Best for small batches | Better for large dough batches |
| Heating speed | Very fast | Usually slower |
| Temperature control | Varies by model | Often more stable |
| Energy use | Usually lower for small tasks | Higher for small tasks |
| Risk of overheating | Higher in compact models | Lower with a proofing setting |
| Convenience | Easy for rolls and pizza dough | Better for large loaves |
If your air fryer becomes too hot, room-temperature proofing may be the better choice. A turned-off microwave can also provide a draft-free space, as long as it is never switched on with the dough inside.
How to Tell When Dough Is Overproofed
Overproofed dough has fermented for too long. It may rise high at first and then lose strength.
Common signs include:
- The dough collapses easily.
- The surface looks wrinkled.
- It smells strongly fermented.
- A finger press leaves a deep mark.
- The dough feels weak and sticky.
- The baked bread has a flat shape or dense center.
You may still be able to save slightly overproofed dough. Gently press out some gas, reshape it, and allow a shorter second rise.
Severely overproofed dough may not recover fully. You can still bake it, but the loaf may have less height and a heavier texture.
Food Safety and Air Fryer Proofing
Proofing dough is generally safe when you use clean tools and keep the temperature controlled. Wash your hands and work with clean bowls and utensils.
Raw flour can contain harmful bacteria, so avoid tasting raw dough. Keep raw dough away from ready-to-eat foods, and clean surfaces after preparation.
Do not use an air fryer that is still heating strongly. Dough should rise in a warm space, not cook in one. If the basket feels hot to the touch, allow it to cool before adding the dough.
Keep plastic wrap away from exposed heating elements. Use only heat-safe materials and follow your air fryer’s manual.
Frequently Asked Questions
Can you proof dough in an air fryer with the heat on?
You can use the heat only if the air fryer has a low proofing setting, usually around 80°F to 95°F. If it runs hotter, turn it off after briefly warming the basket.
How warm should an air fryer be for proofing dough?
Aim for about 80°F to 95°F. Avoid temperatures above 100°F unless your recipe or appliance manual gives specific instructions.
Can you proof frozen dough in an air fryer?
You can thaw and proof frozen dough in an air fryer if the appliance is off or set to a safe low temperature. Let the dough thaw fully before judging its rise.
Can you proof dough in an air fryer basket?
Yes, but a covered bowl or small heat-safe pan is usually better. A bare basket can make dough stick or spread through its holes.
How long does it take to proof dough in an air fryer?
Most dough takes about 30 to 60 minutes in a warm air fryer, but the time depends on the recipe and yeast. Stop when the dough looks puffy and has nearly doubled.
Can you proof sourdough in an air fryer?
Yes, but use extra care because sourdough can ferment quickly in a warm space. A cooler, slower rise often gives sourdough better flavor and structure.
Can you proof dough in an air fryer overnight?
Overnight proofing is usually better in the refrigerator, not a warm air fryer. Cold fermentation slows yeast activity and helps prevent overproofing.
Conclusion
You can proof dough in an air fryer when you use low heat, a covered container, and careful timing. The best temperature is usually between 80°F and 95°F, and the dough should guide you with its size and texture.
Avoid high heat, check the dough often, and remember that a warm air fryer is a tool for gentle fermentation, not cooking. Try this method with a small batch of pizza dough or dinner rolls, then adjust the time for your specific appliance.
If you have tested this method, share your results and explore more bread-baking tips for better homemade dough.