What Setting For Chicken In Air Fryer: Best Temp And Time
Introduction
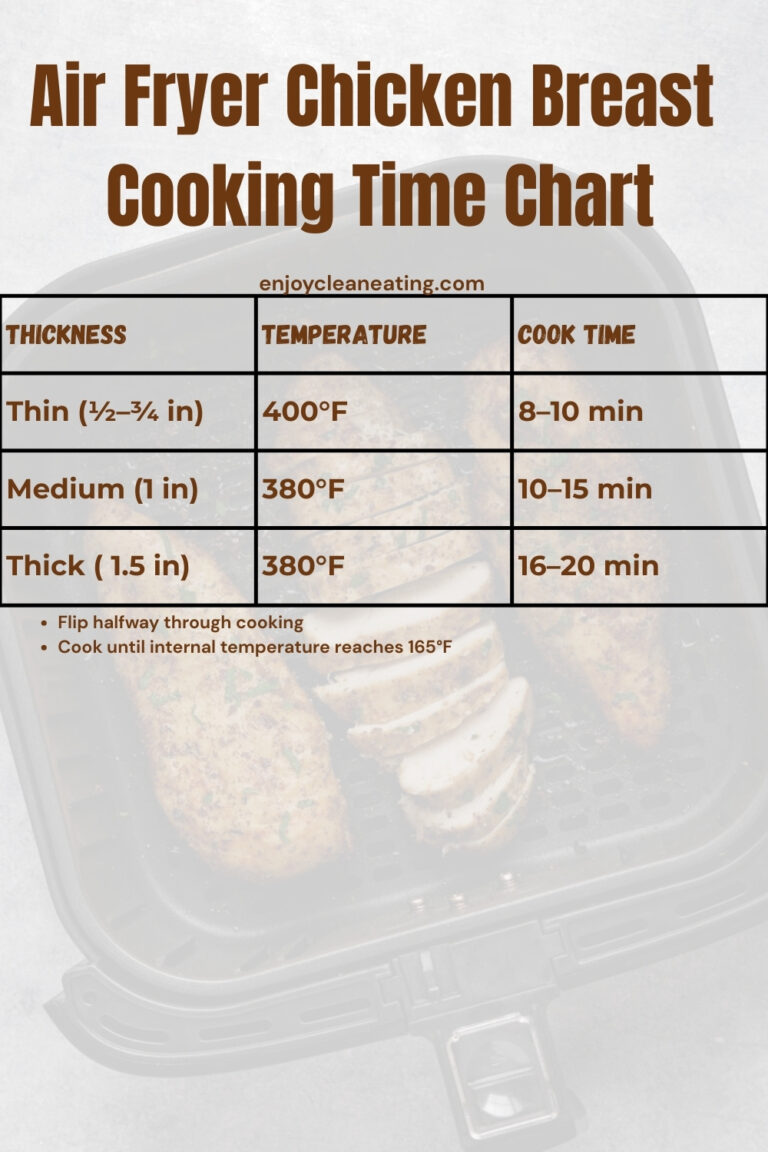
For most chicken in a U.S. air fryer, use 375°F and cook until the thickest part reaches 165°F on a food thermometer. Boneless chicken breasts often take 18–22 minutes, while wings and smaller pieces may cook faster at 400°F.
The right setting depends on the cut, size, bone, and whether the chicken is fresh or frozen. Air fryers also vary, so treat cooking times as guides. The temperature of the meat—not its color or the timer—is the final safety check.

The Best Air Fryer Setting for Chicken
The best starting setting for chicken is 375°F on the Air Fry or Air Crisp function. This heat is high enough to brown the outside while giving thick pieces time to cook through.
Use 400°F for small pieces or foods where you want more browning, such as wings, tenders, and nuggets. Use 350°F to 375°F for thick breasts, bone-in pieces, or heavily coated chicken that may brown too fast.
Quick temperature guide
| Chicken cut | Air fryer temperature | Approximate cooking time |
|---|---|---|
| Boneless chicken breast | 375°F | 18–22 minutes |
| Thin chicken cutlets | 375°F | 10–15 minutes |
| Chicken tenders | 400°F | 10–14 minutes |
| Bone-in chicken thighs | 375°F | 22–30 minutes |
| Chicken drumsticks | 375°F | 22–30 minutes |
| Chicken wings | 400°F | 20–25 minutes |
| Chicken nuggets | 400°F | 8–12 minutes |
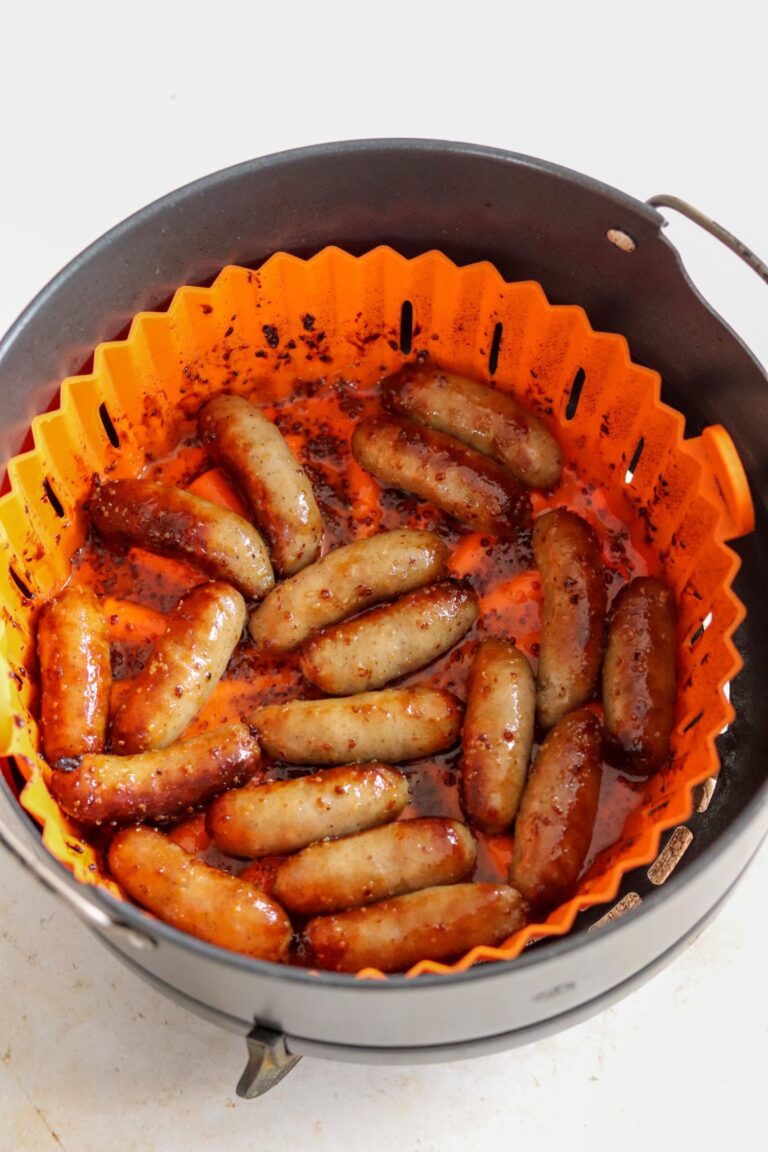
| Chicken sausage | 375°F | 12–18 minutes |
These times are estimates for common portions. A large breast may need more time than a small one. Bone-in chicken usually takes longer than boneless chicken.
The safe internal temperature
The U.S. Department of Agriculture recommends cooking poultry to a minimum internal temperature of 165°F. Measure the temperature in the thickest part of the meat. Avoid touching bone, because bone can give a false reading.
For thin pieces, insert the thermometer from the side. For large breasts or thighs, check the center. If the chicken has not reached 165°F, return it to the air fryer for two- to four-minute intervals.
A browned crust does not prove that chicken is safe. Some chicken can look done before the center reaches a safe temperature.
Air Fry versus Bake
Choose Air Fry or Air Crisp when your appliance offers that choice. These modes use strong hot-air circulation and are made for crisping food.
Use Bake when the recipe calls for gentler heat or when the chicken has a thick coating that may burn. Bake mode can take longer and may produce less crisp skin.
The labels vary by brand. Check your air fryer manual if the controls use different names.

How to Cook Chicken in an Air Fryer
Follow these steps for fresh chicken pieces. They work for breasts, thighs, drumsticks, tenders, and wings with small changes to the time.
1. Prepare the chicken
Pat the chicken dry with paper towels. Dry skin and surfaces brown better than wet surfaces.
Trim loose fat or skin if needed. Apply a small amount of oil, then add salt, pepper, and your chosen spices. Do not use more oil than needed. Air frying does not require deep frying oil.
For breaded chicken, press the coating onto the meat. Loose crumbs can blow around the basket or burn on the heating element.
2. Preheat when useful
preheat the air fryer to the cooking temperature for about 3–5 minutes, unless the manufacturer says not to preheat.
Preheating can help chicken brown more evenly. It is especially useful for wings, tenders, and breaded pieces. Some air fryers heat quickly and do not require a full preheat, so follow the appliance instructions.
3. Arrange the chicken in one layer
Place the chicken in a single layer with space between pieces. Hot air must reach the exposed surfaces.
Do not stack raw chicken. Crowding can slow cooking and leave the exterior less crisp. If you have a small basket, cook in batches.
A light coat of oil on the basket may help prevent sticking. Never fill the basket above the appliance’s recommended line.
4. Cook and turn as needed
Cook at the selected temperature. Turn the chicken halfway through cooking if the recipe or appliance calls for it.
Turning is most helpful for:
- Chicken breasts
- Thighs
- Drumsticks
- Breaded cutlets
- Wings in a crowded basket
You may not need to turn small nuggets or foods with strong air circulation on all sides.
5. Check the thickest part
Start checking a few minutes before the estimated finish time. Insert an instant-read thermometer into the thickest part of the chicken.
The chicken is ready when it reaches 165°F. If the reading is lower, continue cooking and check again soon.
6. Rest and serve
Let the chicken rest for about 3–5 minutes before cutting. Resting can help the juices spread through the meat, although it does not replace cooking to 165°F.
Serve cooked chicken promptly. Refrigerate leftovers within 2 hours, or within 1 hour if the air temperature is above 90°F, according to USDA food-safety guidance.

Air Fryer Chicken Settings by Cut
Different chicken cuts need different settings because thickness, bones, skin, and moisture affect cooking.
Boneless chicken breast
Set the air fryer to 375°F. Cook a typical boneless breast for about 18–22 minutes, turning halfway through.
Very thick breasts may cook unevenly. Pound them to a more even thickness or cut them into cutlets. This helps the center cook before the outside becomes dry.
Use a thermometer in the thickest area. Chicken breast is lean, so extra cooking after it reaches 165°F can make it dry.
Chicken thighs
Set the air fryer to 375°F and cook boneless thighs for about 15–22 minutes. Bone-in thighs often need 22–30 minutes.
Thighs contain more fat than breasts and can stay moist over a wider cooking range. They are still safe only when the thickest part reaches 165°F.
Place thighs skin-side down first if you want the skin to brown from both sides. Turn them during cooking if the top browns too quickly.
Chicken wings
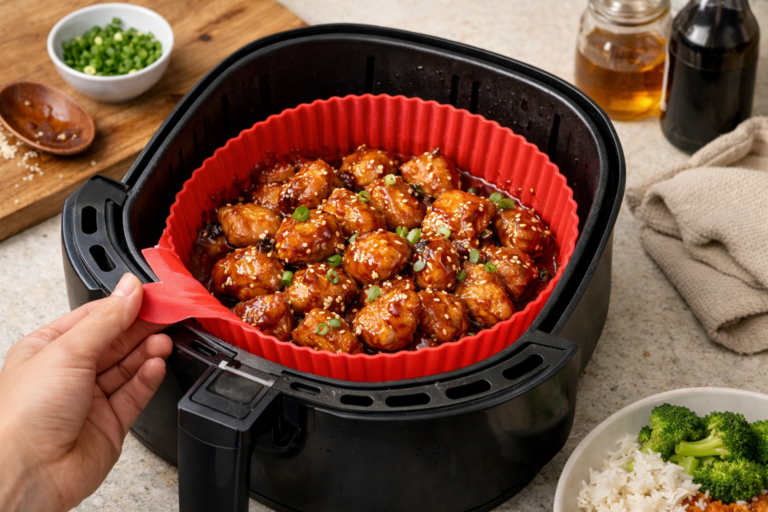
Set the air fryer to 400°F. Most wings take about 20–25 minutes, depending on size and how full the basket is.
Turn or shake the wings halfway through. For crisp skin, pat the wings dry and avoid crowding.
Sauces with sugar can burn at high heat. Cook the wings until safe first, then add barbecue sauce, honey sauce, or another sweet glaze during the final few minutes.
Drumsticks
Set the air fryer to 375°F and cook drumsticks for about 22–30 minutes. Turn them halfway through.
Drumsticks have a thick area near the bone. Check the meat beside, but not against, the bone. If the skin becomes dark before the center is ready, reduce the heat to 350°F and continue cooking.
Chicken tenders and cutlets
Set the air fryer to 400°F. Thin tenders may take 10–14 minutes, while thicker breaded cutlets may need 12–18 minutes.
Turn breaded pieces halfway through to help the coating brown. Spray only a small amount of oil if the coating looks dry.
Because tenders are thin, check them early. They can go from juicy to dry in only a few minutes.
Frozen chicken
Frozen chicken may need more time and may brown less evenly. Check the package directions when available, especially for frozen breaded chicken.
For frozen raw chicken, separate the pieces as soon as possible and cook them in a single layer. Use a thermometer to confirm 165°F in the thickest part. Do not rely on the outside color.
Frozen chicken breasts may need a lower starting temperature, such as 350°F, so the outside does not burn before the center cooks. Raise the heat near the end if more browning is needed.

How to Choose the Right Air Fryer Temperature
Choose the temperature based on the chicken’s thickness, coating, and desired finish.
| Situation | Useful starting setting | Why |
|---|---|---|
| Thick boneless breast | 350°F–375°F | Reduces over-browning |
| Thin tenders or cutlets | 400°F | Cooks quickly and browns the coating |
| Wings with dry skin | 400°F | Promotes crisp skin |
| Bone-in pieces | 375°F | Gives the center more time to cook |
| Sugary sauce or glaze | 350°F–375°F | Helps prevent burning |
| Very crowded basket | 375°F, with more time | Limits rapid browning while the center cooks |
There is no single universal “chicken button” that works for every piece. Preset buttons are starting programs, not guarantees. The preset may assume a certain weight and thickness.
Should you use 350°F, 375°F, or 400°F?
Use 350°F when the chicken is very thick, heavily coated, or covered with a sugary sauce.
Use 375°F as the most flexible setting for breasts, thighs, drumsticks, and general-purpose chicken.
Use 400°F for wings, tenders, thin cutlets, and foods that need a crisp coating.
If the chicken browns too fast, lower the temperature by 25°F. If it reaches 165°F but looks pale, cook it for another one to two minutes while watching it closely.

Common Air Fryer Chicken Problems
Small changes usually solve air fryer chicken problems. Check the thermometer, basket space, and piece size before changing the recipe.
The chicken is raw in the middle
Possible causes include:
- The pieces are too thick.
- The basket is crowded.
- The chicken began frozen.
- The air fryer runs cooler than the displayed temperature.
- The cooking time was based on a smaller piece.
Return the chicken to the air fryer and cook in short intervals. Check the thickest part each time. Do not serve it until it reaches 165°F.
The outside is burnt but the inside is not done
Lower the heat to 350°F or 375°F and continue cooking. You can also cover the dark surface loosely with foil if your appliance manual permits it and the foil cannot reach the heating element.
Do not put loose foil in an empty or preheating air fryer. It can move into the heating element and create a fire risk.
The chicken is dry
Dry chicken often results from overcooking, very small pieces, or cooking lean breast meat too long.
Check the temperature earlier next time. Pound thick breasts to an even size, use a marinade if desired, and remove the chicken soon after it reaches 165°F.
The skin is not crisp
Pat the skin dry before seasoning. Leave space around each piece and avoid adding wet sauce too early.
For wings, a final few minutes at 400°F may improve browning. Watch closely if the seasoning or sauce contains sugar.
The breading is falling off
The surface may be too wet, or the coating may not have been pressed firmly onto the chicken. Pat the chicken dry, use a light flour or egg layer if your recipe calls for it, and press the crumbs into place.
Let coated chicken sit for a few minutes before cooking. Turn it gently with tongs rather than shaking the basket hard.
Smoke is coming from the air fryer
Smoke can come from excess fat dripping onto a hot surface. Stop the appliance if the smoke is heavy or there is a burning smell.
Let it cool, then clean the basket and lower tray according to the manual. Do not pour water into a hot air fryer. If smoke continues, stop using the appliance and contact the manufacturer.

Food Safety Rules for Air Fryer Chicken
Safe handling matters before and after cooking, not just during cooking.
- Wash your hands before and after handling raw chicken.
- Keep raw chicken away from ready-to-eat foods.
- Use a separate cutting board for raw poultry when possible.
- Do not wash raw chicken. Washing can spread bacteria through splashes.
- Use a clean plate for cooked chicken.
- Check the thickest part with a food thermometer.
- Cook poultry to at least 165°F.
- Refrigerate leftovers within the recommended time.
- Reheat leftovers until hot throughout; a thermometer can help confirm the center reaches 165°F.
Clean the basket, tray, and surfaces that touched raw chicken. Follow the air fryer manufacturer’s cleaning instructions, especially for nonstick parts.
Can you put raw chicken in an air fryer?
Yes. An air fryer can cook raw chicken, provided the chicken reaches 165°F in the thickest part.
Arrange raw pieces so air can circulate. Do not place cooked food back on a plate that held raw chicken unless the plate has been washed first.
Can you cook chicken from frozen?
Yes, but frozen chicken usually takes longer and may cook less evenly. Small frozen pieces are easier to manage than large frozen breasts.
Separate pieces when possible, avoid crowding, and check several pieces with a thermometer. For packaged products, use the package directions as the first guide.

Key Takeaways
- Start with 375°F for most air fryer chicken.
- Use 400°F for wings, tenders, and thin breaded pieces.
- Cook chicken until the thickest part reaches 165°F.
- Use cooking times as estimates, not proof of doneness.
- Keep pieces in one layer with space between them.
- Lower the temperature if the outside browns before the center cooks.
- Use a clean thermometer and plate for cooked chicken.
FAQs
What is the best setting for chicken in an air fryer?
The best general setting is Air Fry or Air Crisp at 375°F. Adjust to 350°F for very thick or heavily coated chicken, or 400°F for wings and thin tenders.
How long does chicken take in an air fryer at 375°F?
Most boneless chicken breasts take about 18–22 minutes. Bone-in thighs and drumsticks often take 22–30 minutes. The exact time depends on size, starting temperature, and basket space.
Do you need to flip chicken in an air fryer?
Flipping is helpful for thick pieces, breaded cutlets, drumsticks, and wings. It is not always needed for small foods, but it can improve even browning.
Should you preheat an air fryer before cooking chicken?
Preheating for 3–5 minutes can improve browning and reduce cooking-time variation. Some models do not need preheating, so follow the manufacturer’s directions.
How do you know when air fryer chicken is done?
Check the thickest part with a food thermometer. Chicken is ready when it reaches 165°F. Color, firm texture, and clear juices are not reliable substitutes for a temperature check.
Conclusion
For a simple starting point, set the air fryer to 375°F, place the chicken in one layer, and begin checking it before the estimated finish time. The final test is always 165°F in the thickest part.
Use lower heat for thick pieces that brown too quickly and higher heat for wings or thin tenders that need a crisp surface. Once you know the cut and weight, adjust the time—but keep the food-safety temperature constant.