What To Do With A New Air Fryer: First Steps Guide
A new air fryer is ready to cook only after you remove its packaging, wash the removable parts, check the manual, and run a short test cycle if the manufacturer recommends one. In the United States, also check the voltage label, use a grounded wall outlet when required, and leave space around the appliance for heat and airflow.
Most first-time problems come from skipping setup. Plastic film gets left on a basket, the first food tastes like factory residue, or the basket is filled so full that food cooks unevenly. A few simple steps can help you start with crisp food and fewer safety risks.

1. Read the manual and inspect the air fryer
Start with the manual for your exact model. Air fryers differ in basket limits, cooking modes, preheating rules, dishwasher guidance, and whether a test run is needed.
Before plugging it in:
- Remove all cardboard, foam, tape, stickers, and plastic film.
- Check the basket, crisper plate, pan, cord, plug, and housing for damage.
- Confirm that the basket and pan lock into place.
- Find the maximum fill line, if the basket has one.
- Check the power rating and plug type on the appliance label.
- Make sure the model is intended for use with the electrical supply in your home.
Do not use an air fryer with a damaged cord, cracked basket, loose plug, or broken handle. Contact the manufacturer or retailer for repair or replacement guidance.
Choose a safe location
Set the air fryer on a firm, level, heat-resistant surface. Keep it away from the edge of the counter, the sink, water, and items that can melt.
Leave the clear space stated in the manual. If the manual does not give a distance, avoid placing the unit directly under a cabinet or against a wall. Hot air and steam need a clear path to escape.
Do not place anything on top of the air fryer while it runs. Keep the cord away from hot surfaces and areas where it can be pulled or caught.
Should you remove the rubber pieces?
Many air fryer baskets have silicone feet, bumpers, or supports. Do not remove them unless the manual says to do so. They may keep the basket from scratching the pan or help hold the crisper plate in place.
Remove only shipping materials and labels that the instructions identify as removable.

2. Wash the removable parts before cooking
Wash the basket, pan, and crisper plate before their first use. Use warm water, mild dish soap, and a soft sponge unless the manual gives different instructions.
Do not immerse the main air fryer body, heating unit, control panel, or power cord in water. Wipe those parts with a damp cloth, then dry them fully.
Check whether the parts are dishwasher-safe. “Dishwasher-safe” does not mean every part can go in every dishwasher cycle without wear. Nonstick coatings may last longer when you avoid abrasive pads, harsh cleaners, and metal utensils.
Dry each removable part before putting it back into the air fryer. Water left in the pan can create extra steam and may affect the first test cycle.
What if the air fryer smells like plastic?
A mild new-appliance odor during the first use can occur. It should lessen after washing and, when allowed by the manual, running the appliance empty for a short cycle in a well-ventilated room.
Do not use the air fryer if it produces heavy smoke, sparks, a burning electrical smell, or a strong chemical odor that does not fade. Unplug it if you can do so safely, let it cool, and contact the manufacturer.
Never spray cleaner, fragrance, oil, or any other liquid into the heating unit.

3. Run a first test cycle if the manual allows it
Some manufacturers recommend an empty test run. Others do not. Follow the instructions for your model instead of using a universal time and temperature.
A typical first-use sequence is:
- Put the clean basket and pan into the appliance.
- Place the air fryer on its clear, open counter space.
- Plug it directly into a suitable wall outlet unless the manual gives other instructions.
- Set the test temperature and time listed in the manual.
- Stay nearby while it runs.
- Watch for unusual smoke, sparks, error codes, or a strong electrical odor.
- Let the appliance cool completely when the cycle ends.
- Wash or wipe the basket again if the manual advises it.
A little odor may be normal during the first cycle. Thick smoke, flames, repeated tripping of a circuit breaker, or melting parts are not normal signs of a successful setup.
Do not run the appliance empty with parchment paper, aluminum foil, or other loose material inside. Air from the fan can lift loose items toward the heating element.

4. Learn how the controls work
Before cooking a full meal, identify the basic controls:
- Temperature: The heat level, often shown in degrees Fahrenheit on U.S. models.
- Time: The cooking period after the unit begins heating.
- Start or pause: The control that begins or stops the program.
- Preheat: A separate heating stage on some models.
- Shake or turn reminder: An alert that helps you move food during cooking.
- Keep warm: A holding function that may affect texture and food safety if used too long.
Some air fryers begin cooking as soon as you set the time. Others require you to press Start. A few models heat only when the basket is fully inserted.
Do you need to preheat a new air fryer?
Preheating depends on the recipe and the model. A short preheat can help foods begin cooking at a steady temperature, but many foods can cook well without it.
Follow the recipe and appliance manual first. If neither gives clear guidance, preheat when you want a firm crust or when a recipe gives a preheated cooking time. Add food only after the preheat signal or cycle ends.
Do not assume the displayed temperature matches the temperature at every point inside the basket. Air circulation, food size, basket load, and opening the drawer can change cooking speed.
5. Start with simple foods
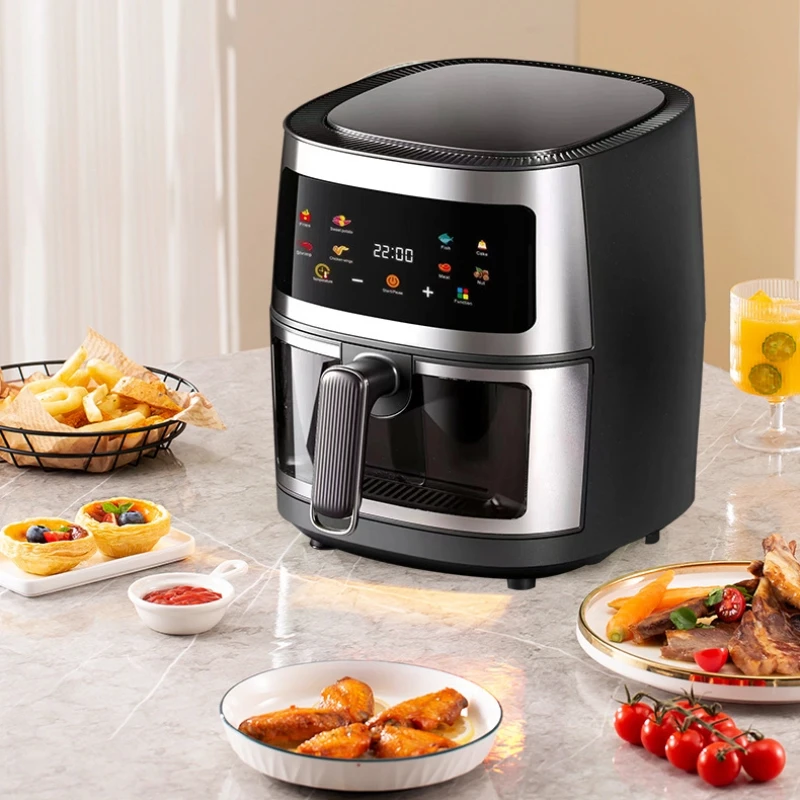
Use your first cooking session to learn how the air fryer heats. Choose food with a clear visual finish and a low mess risk.
Good first choices include:
- Frozen French fries
- Frozen tater tots
- Frozen breaded vegetables
- Brussels sprouts or broccoli
- Small potato pieces
- Chicken wings, if you use a food thermometer
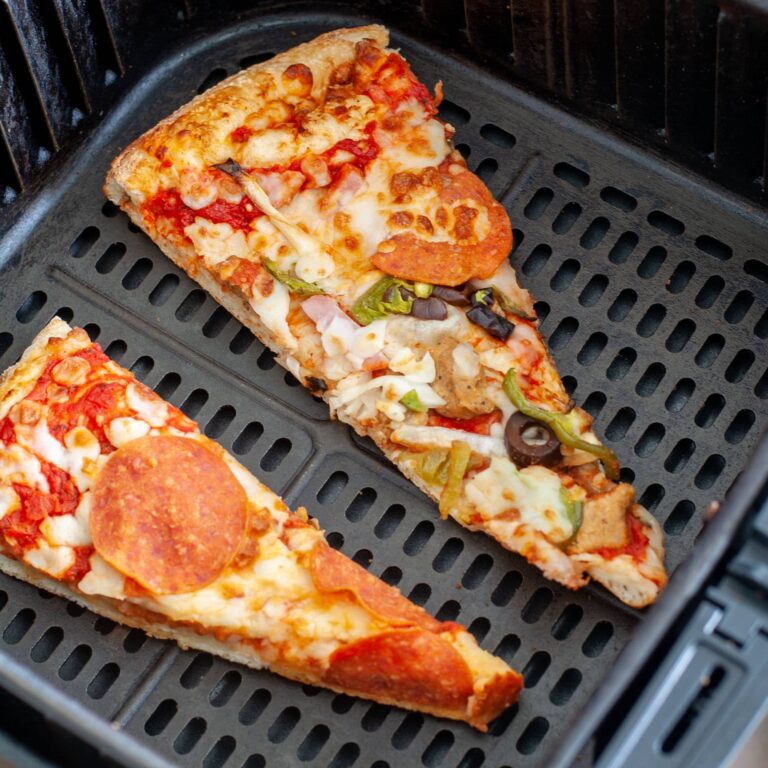
- Reheated pizza or other crisp foods
Frozen foods often need little or no added oil. Fresh vegetables may benefit from a small amount of oil to improve browning, but too much oil can drip into the pan and create smoke.
Cut fresh food into pieces of similar size. Keep space between pieces when you want crisp edges. Air must move around the food for the air fryer to work well.
A simple first-use method
Use this process for a basic test meal:
- Select a food that fits the basket without reaching above the safe fill line.
- Dry fresh food before adding oil or seasoning.
- Add only the amount of oil the recipe needs.
- Spread the food in a mostly even layer.
- Choose the recipe’s temperature and time.
- Shake or turn the food when the recipe calls for it.
- Check the food before the timer ends.
- Use a food thermometer for meat, poultry, seafood, and reheated leftovers.
- Let the food rest as needed, then serve.
Cooking time is a starting point, not a guarantee. Two air fryers set to the same temperature may cook at different speeds. Food size, starting temperature, moisture, and basket depth all matter.
Food safety temperatures
Color and crispness do not prove that meat or poultry is safe to eat. Use a food thermometer and check the thickest part of the food.
The U.S. Department of Agriculture recommends these minimum internal temperatures:
| Food | Minimum internal temperature |
|---|---|
| Poultry, including chicken and turkey | 165°F |
| Ground meats | 160°F |
| Beef, pork, lamb, and veal steaks, chops, and roasts | 145°F, followed by a 3-minute rest |
| Fish | 145°F |
| Leftovers and casseroles | 165°F |
Measure temperature in several places when pieces vary in size. The FDA also advises using a food thermometer rather than relying on appearance alone.

6. Use oil, foil, and parchment with care
An air fryer does not need a large amount of oil. It uses hot moving air to heat and brown food. A light coating can improve color and texture, but oil is not a substitute for correct cooking time or safe internal temperature.
Avoid pouring oil into the bottom of the pan unless the manual specifically permits it. Extra oil can smoke, splatter, or collect under the food.
Parchment paper
Use parchment only when the manual and the parchment product allow it. Keep it under food so the food weighs it down. Do not put loose parchment into an empty, preheating basket.
Perforated parchment can allow better air movement. Never let parchment touch the heating element.
Aluminum foil
Aluminum foil may be allowed for some models and recipes, but it can block airflow or interfere with the basket. Use it only in the way the manual describes. Do not cover all ventilation openings.
Cooking sprays
Some aerosol sprays may damage certain nonstick coatings or leave residue. Check the air fryer manual and the spray label. A small amount of oil applied to the food is often easier to control.

7. Clean the air fryer after each use
Clean the basket and pan after the appliance cools. Food residue and grease can smoke during the next cooking cycle.
A basic cleaning routine is:
- Unplug the air fryer.
- Let the appliance cool fully.
- Remove the basket, pan, and crisper plate.
- Empty crumbs and grease.
- Wash removable parts with mild dish soap and a soft sponge.
- Wipe the inside with a damp cloth.
- Wipe the heating element only as the manual directs.
- Dry all parts before reassembly.
- Check the air intake and exhaust for blocked debris.
Do not use steel wool, sharp tools, or abrasive cleaners on nonstick parts. Do not scrape stuck food with a knife.
If grease remains, soak the removable parts only if the manual allows it. Do not carry a hot pan to the sink and pour cold water over it. A sudden temperature change can damage parts or create a burn hazard.

8. Troubleshoot common first-use problems
Check the simplest and safest cause first. If the problem involves smoke, sparks, damaged wiring, or repeated power loss, stop using the appliance.
| Problem | Likely cause | What to do |
|---|---|---|
| Food is soft instead of crisp | Basket is crowded or food is wet | Cook a smaller batch and dry fresh food |
| Food cooks unevenly | Pieces vary in size or were not moved | Cut evenly and shake or turn food |
| Heavy smoke appears | Excess grease, oily food, or residue | Stop if smoke is severe; cool and clean the appliance |
| New smell remains | First-use odor, packaging, or residue | Check for missed film and follow the manual’s test-cycle advice |
| Air fryer will not start | Basket is not seated or controls are not set | Reinsert the basket and check the manual |
| Outside becomes hot | Normal heat transfer during use | Keep children away and maintain clear space |
| Circuit breaker trips | Outlet load, appliance fault, or wiring issue | Unplug it and seek qualified help if the problem repeats |
| Food burns before it is done | Pieces are too small or temperature is too high | Lower the temperature and check sooner |
Do not keep resetting a tripped breaker. An appliance that repeatedly trips a breaker may have a fault or may be sharing a circuit with other high-power devices.
If the display shows an error code, look it up in the model’s manual or official support page. Do not guess at electrical repairs.

9. Avoid these common new-air-fryer mistakes
The most common mistakes are easy to prevent:
- Leaving packaging inside: Check under the basket, around the pan, and near the heating element.
- Overfilling the basket: A deep pile blocks airflow and creates uneven cooking.
- Using wet batter: Loose wet batter may drip through the basket and make a mess. Use a recipe designed for air frying.
- Adding too much oil: Excess oil can smoke and collect below the basket.
- Skipping food-temperature checks: Meat can look browned before it reaches a safe internal temperature.
- Blocking vents: Do not cover the exhaust or place the unit against a wall.
- Washing the main unit: Only removable parts should be washed with water.
- Using metal tools: They can scratch nonstick surfaces.
- Leaving the appliance unattended: Stay close during early uses, especially when cooking fatty foods.
- Assuming every preset is exact: Presets are starting points. Adjust for food size and your model.
When should you contact the manufacturer?
Contact the manufacturer if the air fryer:
- Sparks or emits smoke from the control area
- Has a damaged cord or plug
- Smells strongly of burning plastic or wiring
- Shows repeated error codes
- Melts, cracks, or warps during normal use
- Trips the circuit repeatedly
- Does not heat after you follow the manual
Keep the model number, purchase date, and receipt. These details can help with support, warranty, or safety notices.

Frequently Asked Questions
Can I use a new air fryer right away?
Yes, after removing all packaging, washing the removable parts, checking the manual, and setting the unit on a safe surface. If the manual recommends an empty test cycle, complete it before cooking food.
Should I run my air fryer empty before using it?
Only if the manufacturer recommends it. Some models include a first-use burn-in step, while others do not. Never place loose parchment, paper, or foil in an empty basket.
Can I put water in an air fryer to clean it?
Do not pour water into the main unit or heating area. For the basket and pan, use the cleaning method in the manual. Let hot parts cool before washing them.
Can I use an extension cord with an air fryer?
Use a wall outlet unless the manual specifically permits an extension cord and gives the needed rating. Air fryers draw substantial power, so an unsuitable cord can overheat.
Why does my new air fryer smell?
A mild odor may come from new materials or manufacturing residue and may fade after cleaning and a manufacturer-approved test cycle. A strong or persistent chemical or electrical smell is a reason to stop using the appliance and contact the manufacturer.
What should I cook first in an air fryer?
Choose a simple food such as frozen fries, tater tots, vegetables, or reheated pizza. These foods help you learn the air fryer’s cooking speed without requiring a complex recipe.
Conclusion: Your first air fryer checklist
Before cooking, remove every piece of packaging, wash the removable parts, read the model manual, and place the appliance on a clear, heat-resistant surface. Run a test cycle only when the manufacturer advises it.
For the first meal, avoid overfilling the basket. Cook in a small, even layer, shake or turn food when needed, and use a food thermometer for meat, poultry, seafood, and leftovers. Clean the basket and pan after the appliance cools.
Your next step is simple: inspect the air fryer, complete the model-specific setup, and cook one small batch so you can learn how your appliance behaves.